How to set up Shipping Classes for bluedart
Bluedart offers different services for different types of products on the basis of their weight and value. Shipping charges vary as weight and value vary. How to set up Shipping Classes for bluedart Expensive products are needed to handle and ship carefully hence, we have classified products into two categories valuable products (VCHC) and not-so-valuable products(non-VCHC)..
We will understand this with a Use case: We had a Jewellery shopping website that dealt with expensive products like gold, silver, diamond, etc. So, customers need to pay extra shipping charges for such products i.e, Valuable Cargo Handling Charges (VCHC), and other products were charged regular shipping charges.
Points discussed here:
- Classification of products on the basis of Bluedart shipping charges.
- Adding shipping class in woocommerce.
- Assign shipping class to products.
1. Classification of products on the basis of Bluedart shipping charges.
VCHC Category
Let us see what is Valuable Cargo Handling Charges (VCHC), in bluedart VCHC is applied to those products whose % of declared value exceeds 10,000/- per kg based on actual weight. eg: The value of 1kg gold exceeds 10,000 so VCHC is applied here. Valuable cargo requires special handling, Precious shipments need special attention to ensure safe and secured transport.
NON-VCHC Category
The website also contains gift articles that did not come under this category. We classified products on the basis of VCHC and non-VCHC.
The majority of my products come under the Bluedart VCHC category. So, instead of creating different shipping classes for gold, silver, and diamond, we created only one shipping class i.e, Gift Articles(non-VCHC).
2. Adding shipping class in WooCommerce.
Shipping Class
The shipping class can be used to classify and group products of similar types. We can assign different shipping rates to different types of products using shipping class.
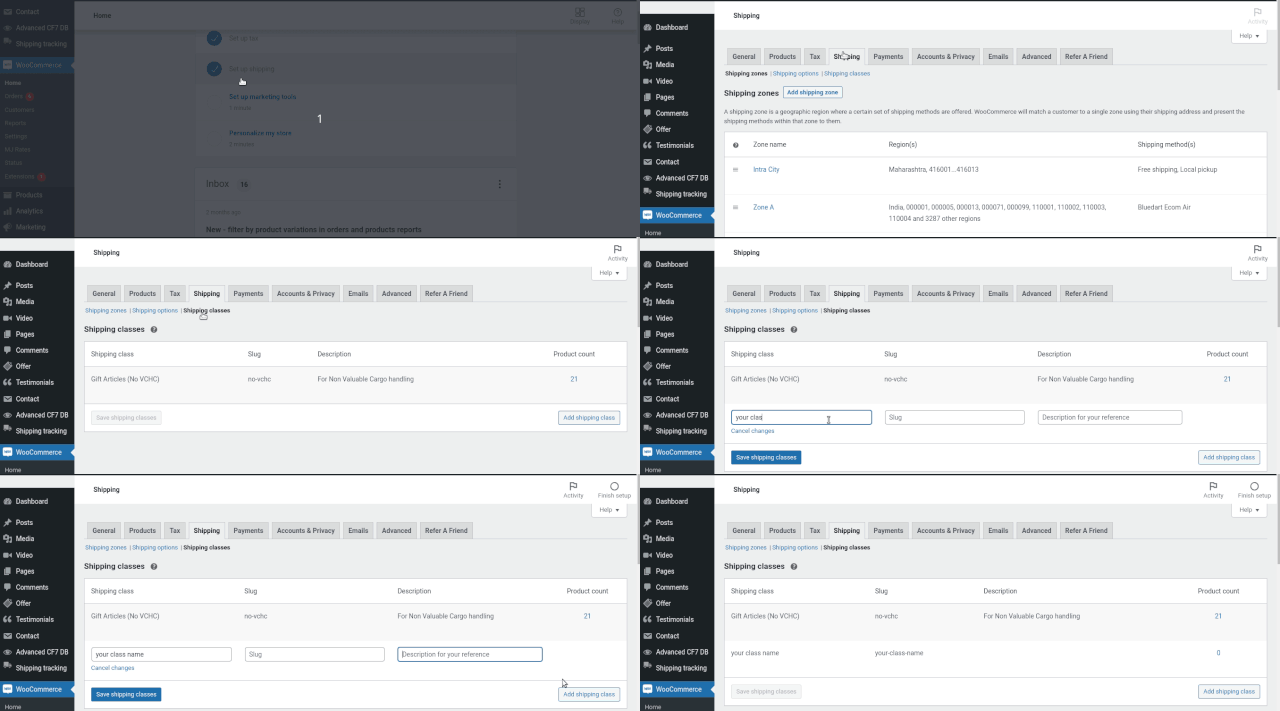
Creating a new shipping class in WooCommerce: On your WordPress dashboard, go to WooCommerce→Settings→Shipping→Shipping Class, right below the shipping class you will find add shipping class button.
Click on the button and a new shipping class will appear with a few fields, you need to fill those fields:
- Shipping class name – unique name of your class.
- Slug – optional field, if you don’t enter it will appear inevitably.
- Description – only visible to admin.

3. Assign shipping class to products.
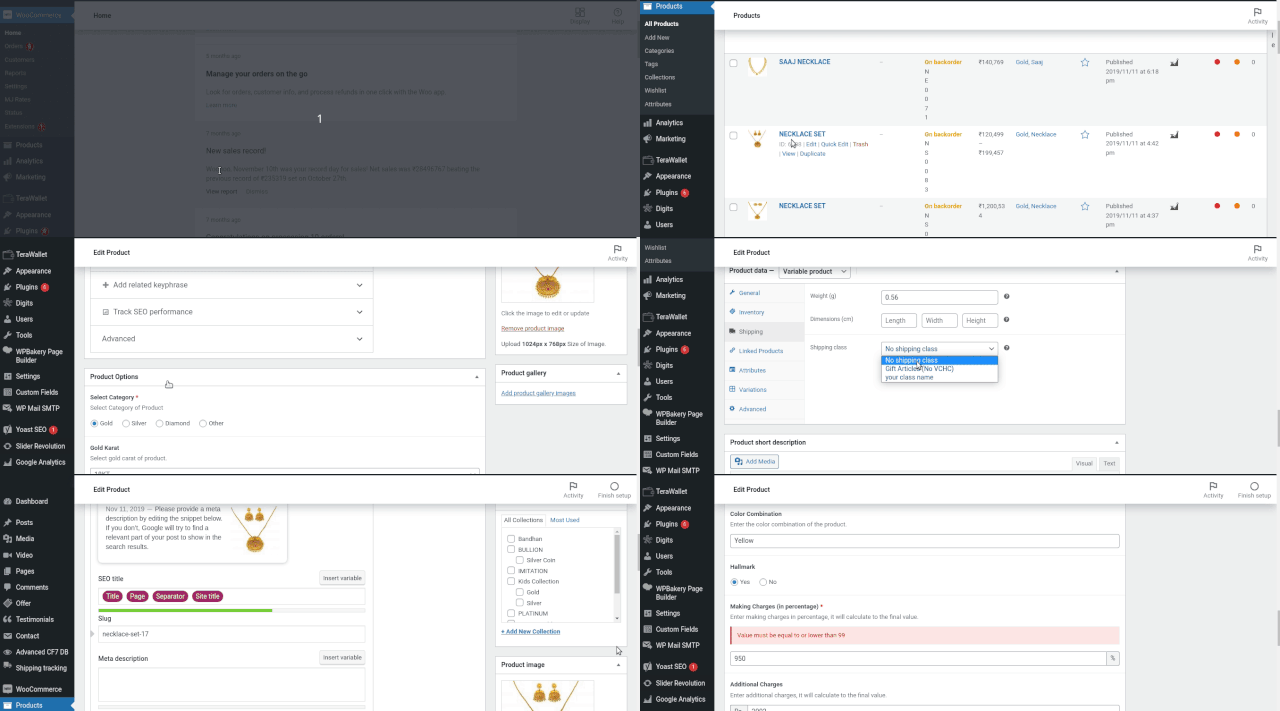
Assign created shipping class to a product: On the dashboard under products menu, select a single product and edit it.

Go to product data, click on the shipping tab, and add the desired shipping class to the product, that’s all, now save changes. The majority of products were valuable except gift articles. To reduce the effort of assigning a class to each valuable product, we created only one class for all gift articles(NON-VCHC) and made the task easy. How to set up Shipping Classes for bluedart
Once you are done with creating shipping classes, next is creating Bluedart shipping zones and methods.

