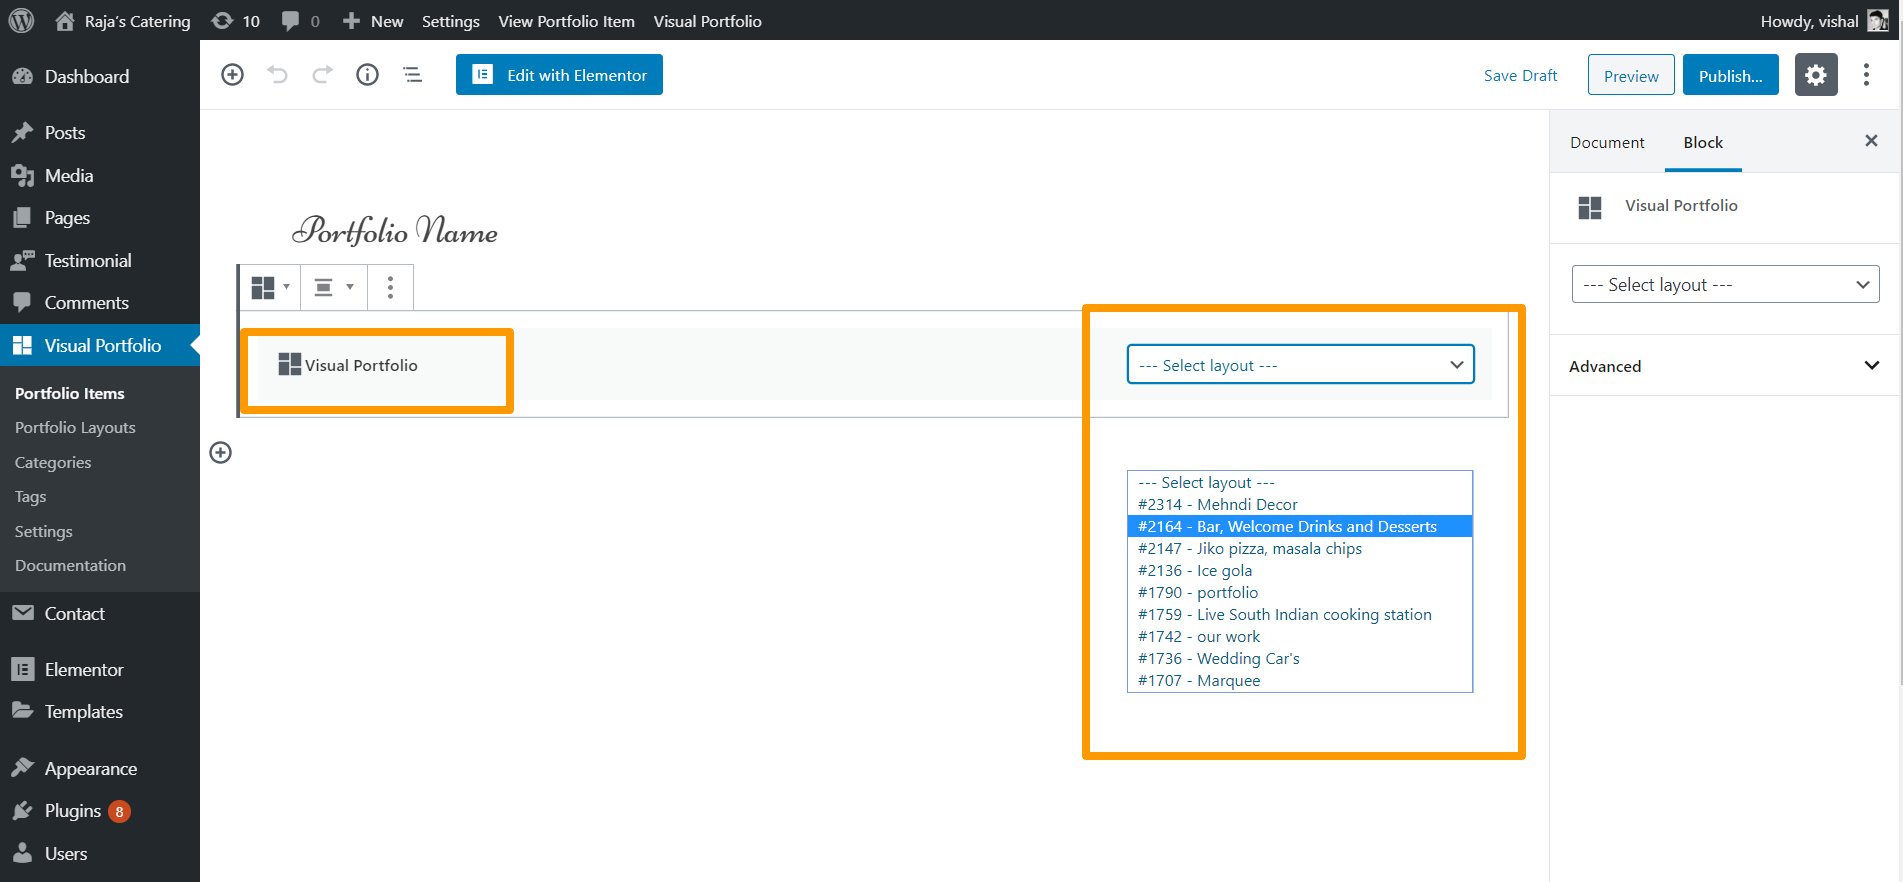
Steps to create the portfolio
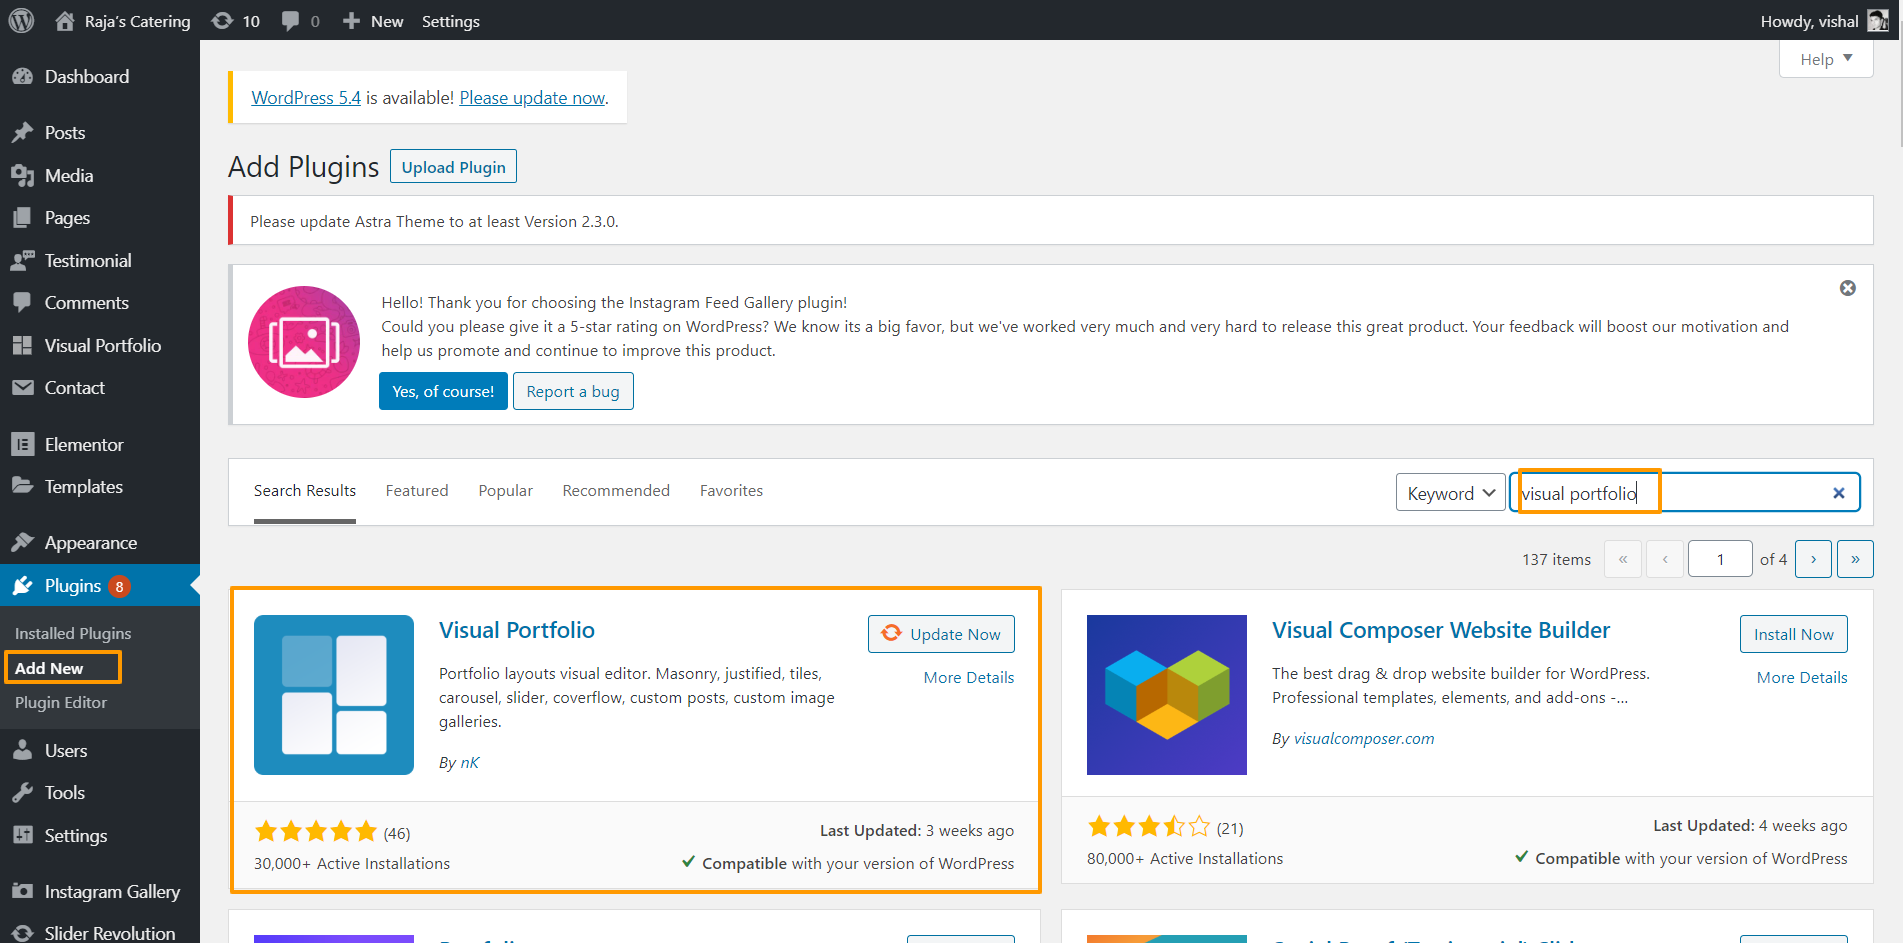
Step 1: Add Plugin
Install and Activate Visual Portfolio the plugin. Visual Portfolio let you create beautiful portfolio layouts and image galleries. Generates shortcode to show portfolio or any custom post types using Masonry, Justified, Tiles or Carousel layouts.
Goto Plugins -> Add New
Search Visual Portfolio
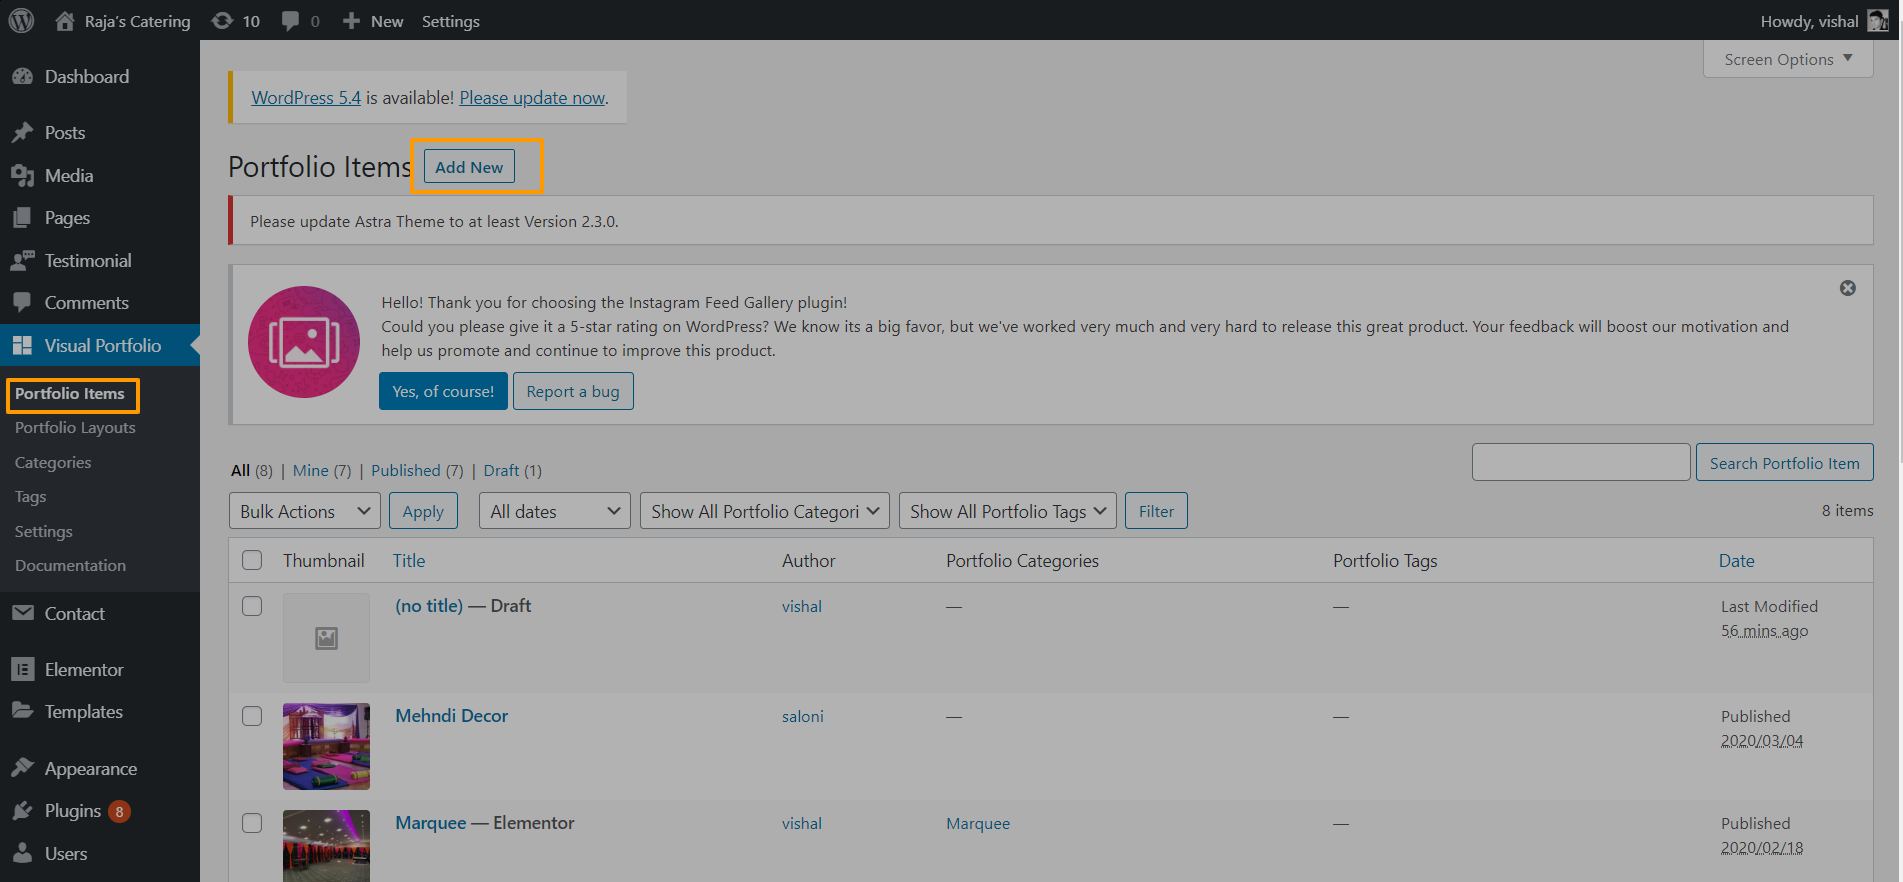
Step 2: Create Portfolio Items
To create new Portfolio Items Go To Visual Portfolio -> Portfolio Items.
Click on add new
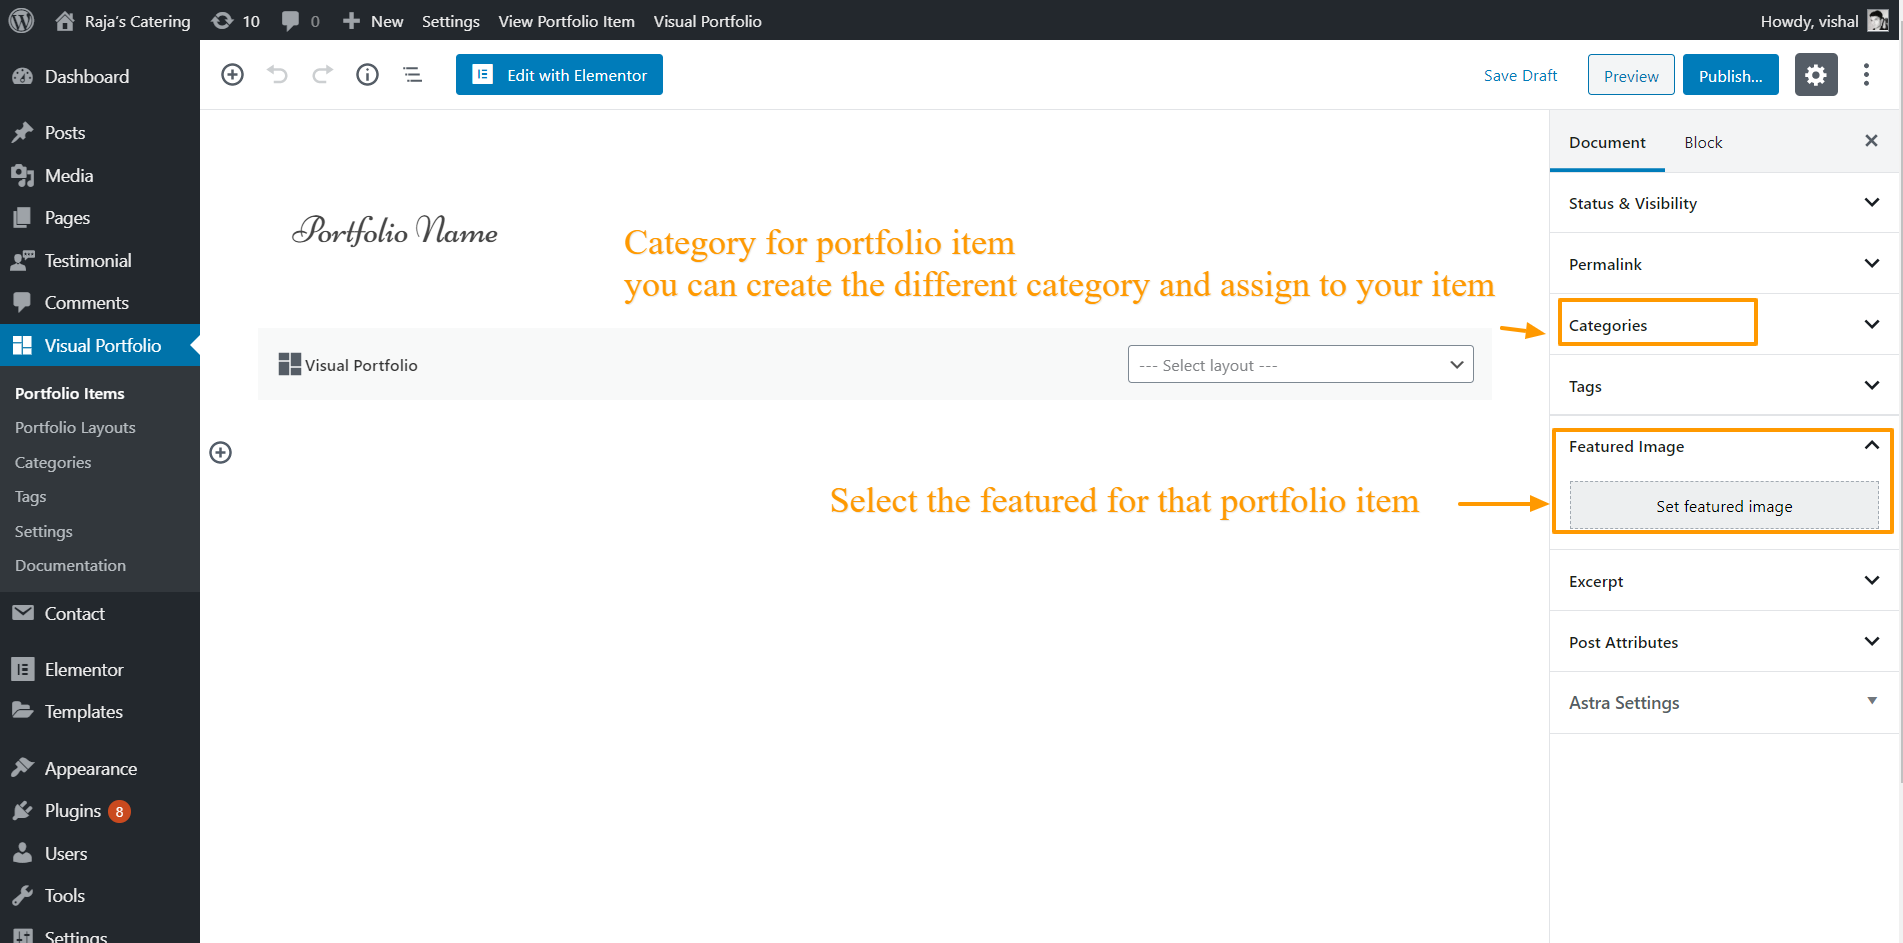
URL option: You can fill your portfolio item post with different post blocks. If you select the URL option as the Items Click Action for your portfolio layout, you’ll see a whole post when you click on an item featured image in your portfolio.
Popup Gallery option: If you select the Popup Gallery option as the Items Click Action for your portfolio layout, you’ll see featured images in a popup gallery.
Select the layout for portfolio from your layout. (Note : Layouts are explained in below section.)
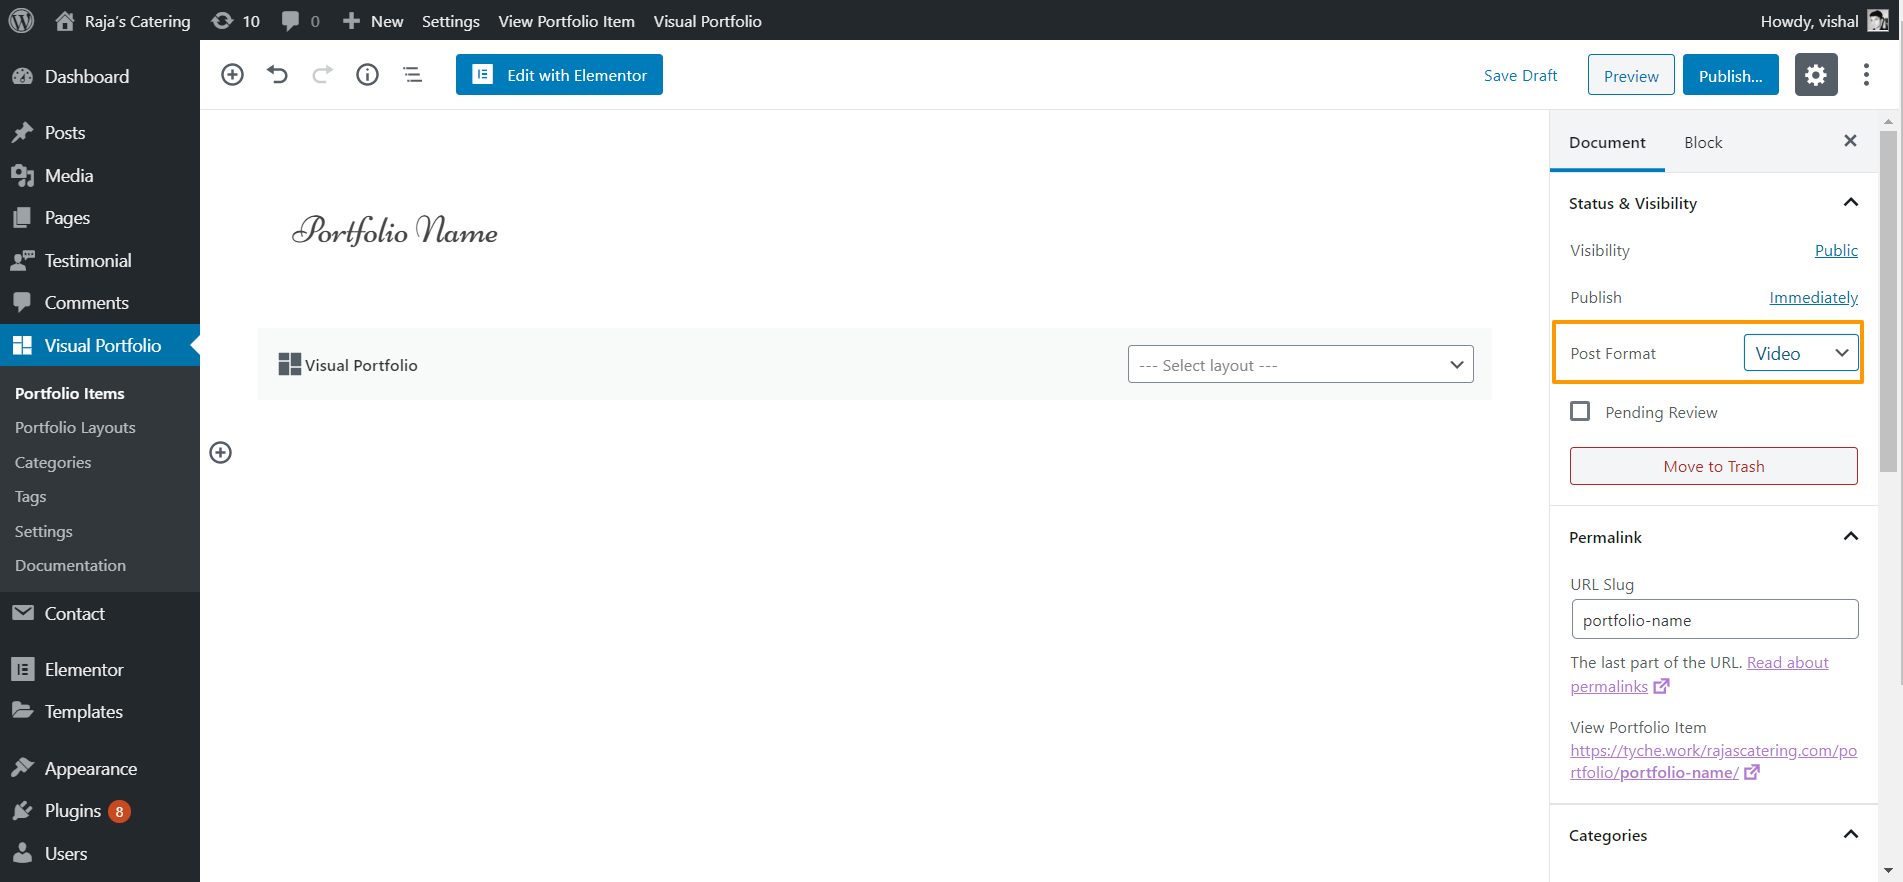
You also can add the video portfolio items by Setting the Post format as Video on the Settings sidebar
 .
.
Portfolio Layouts
-
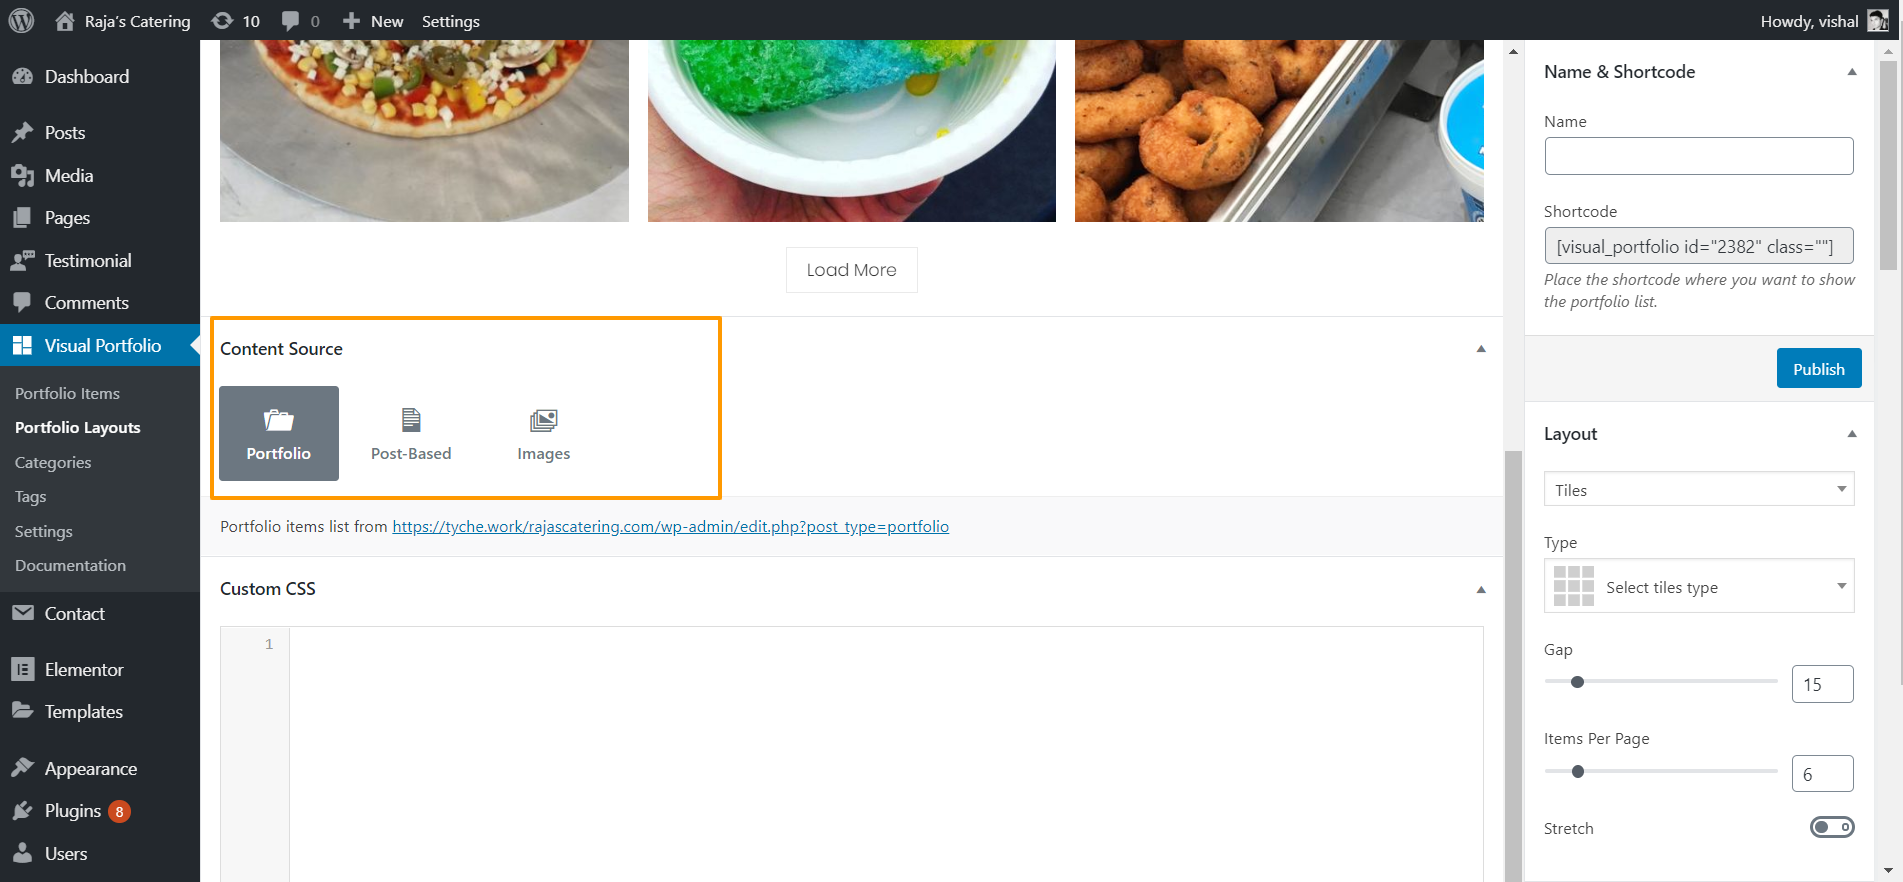
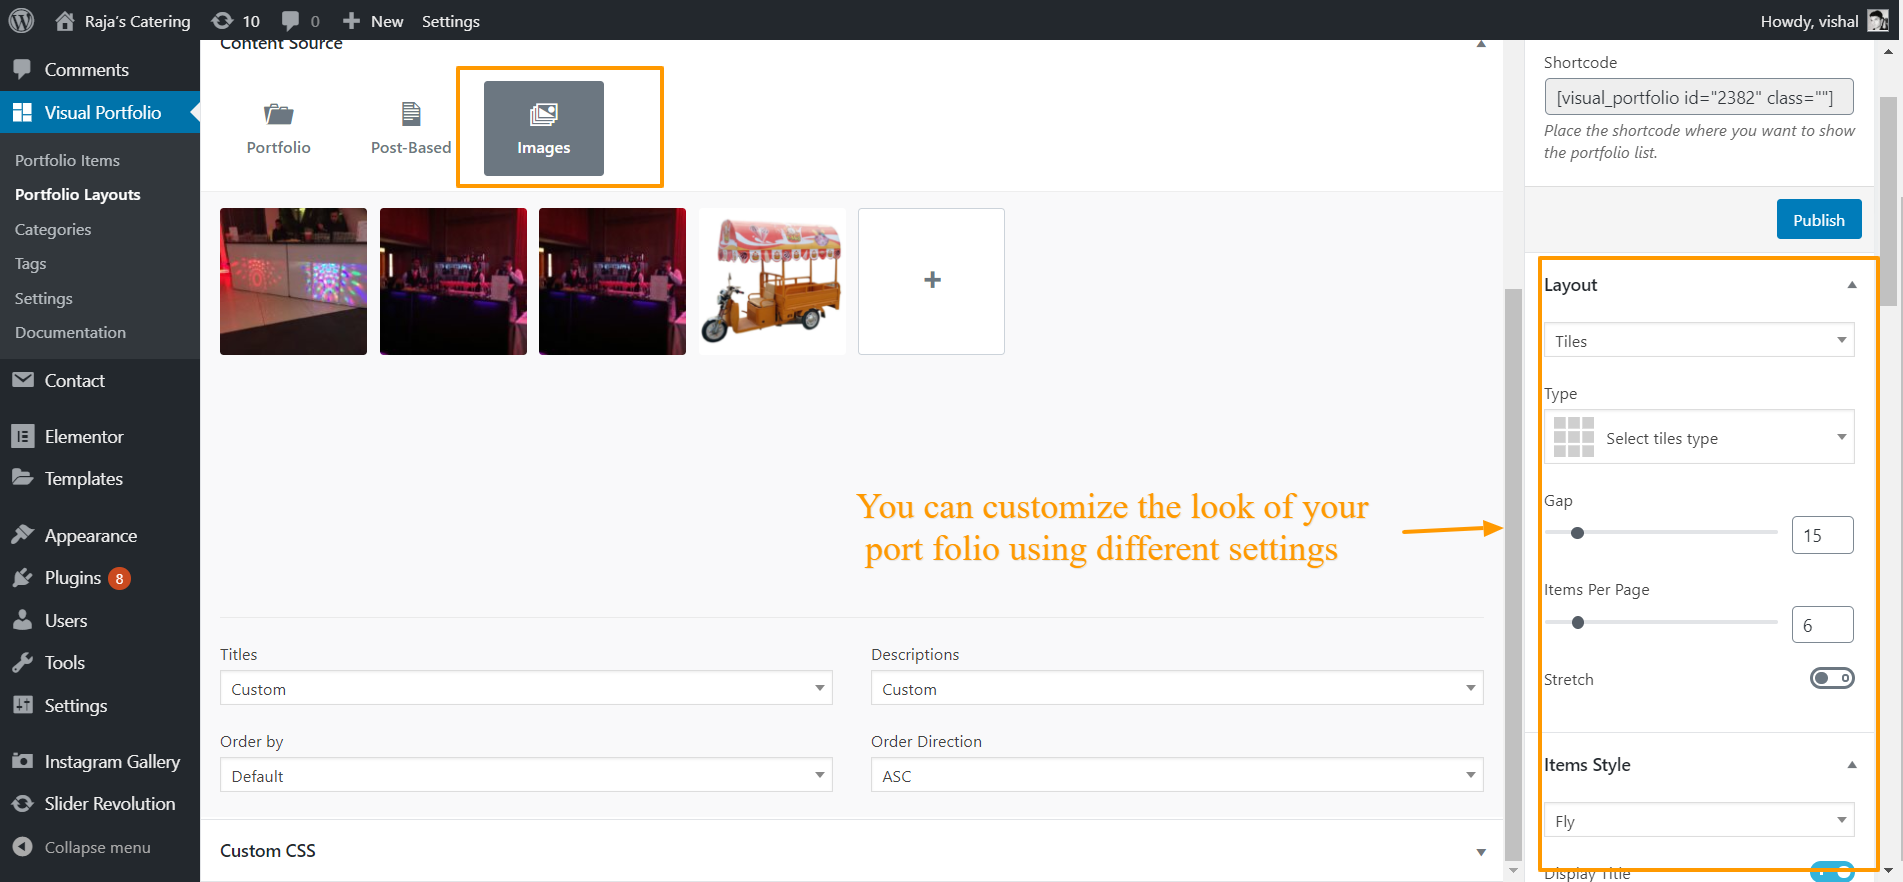
Content Source
During creating the portfolio lay out you can select the source for your portfolio as shown in image below

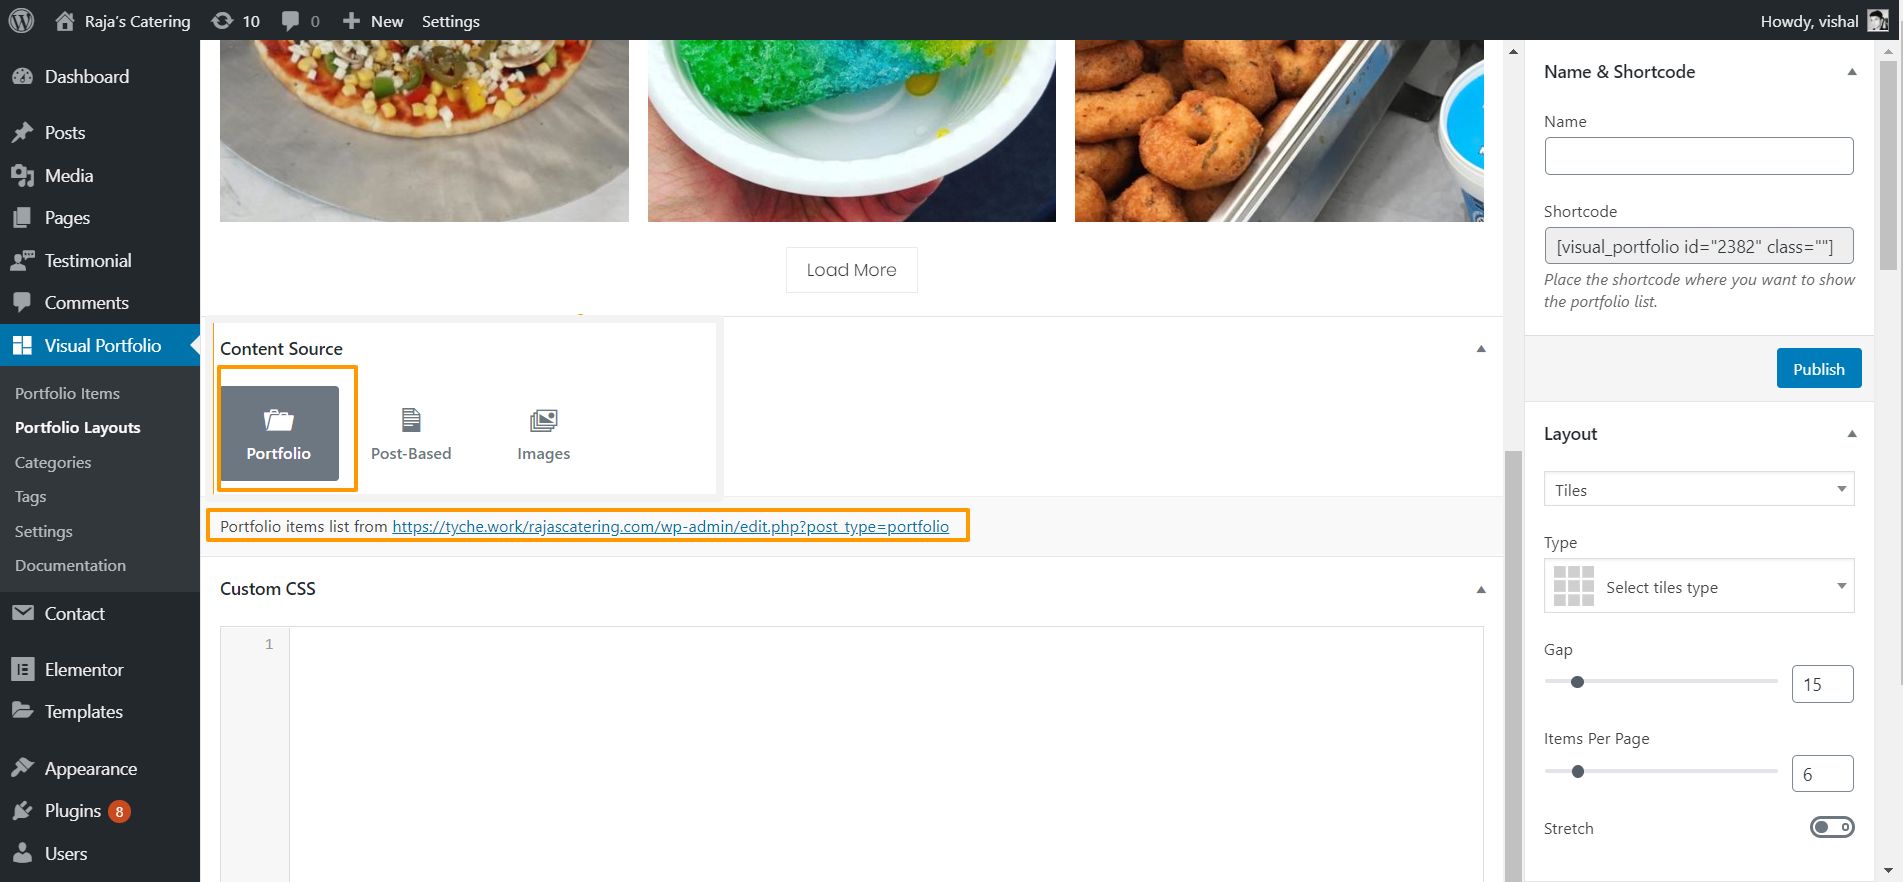
- Portfolio Items
If you create the lay out using the lay out using portfolio item. It select the all portfolio items from your portfolio item list

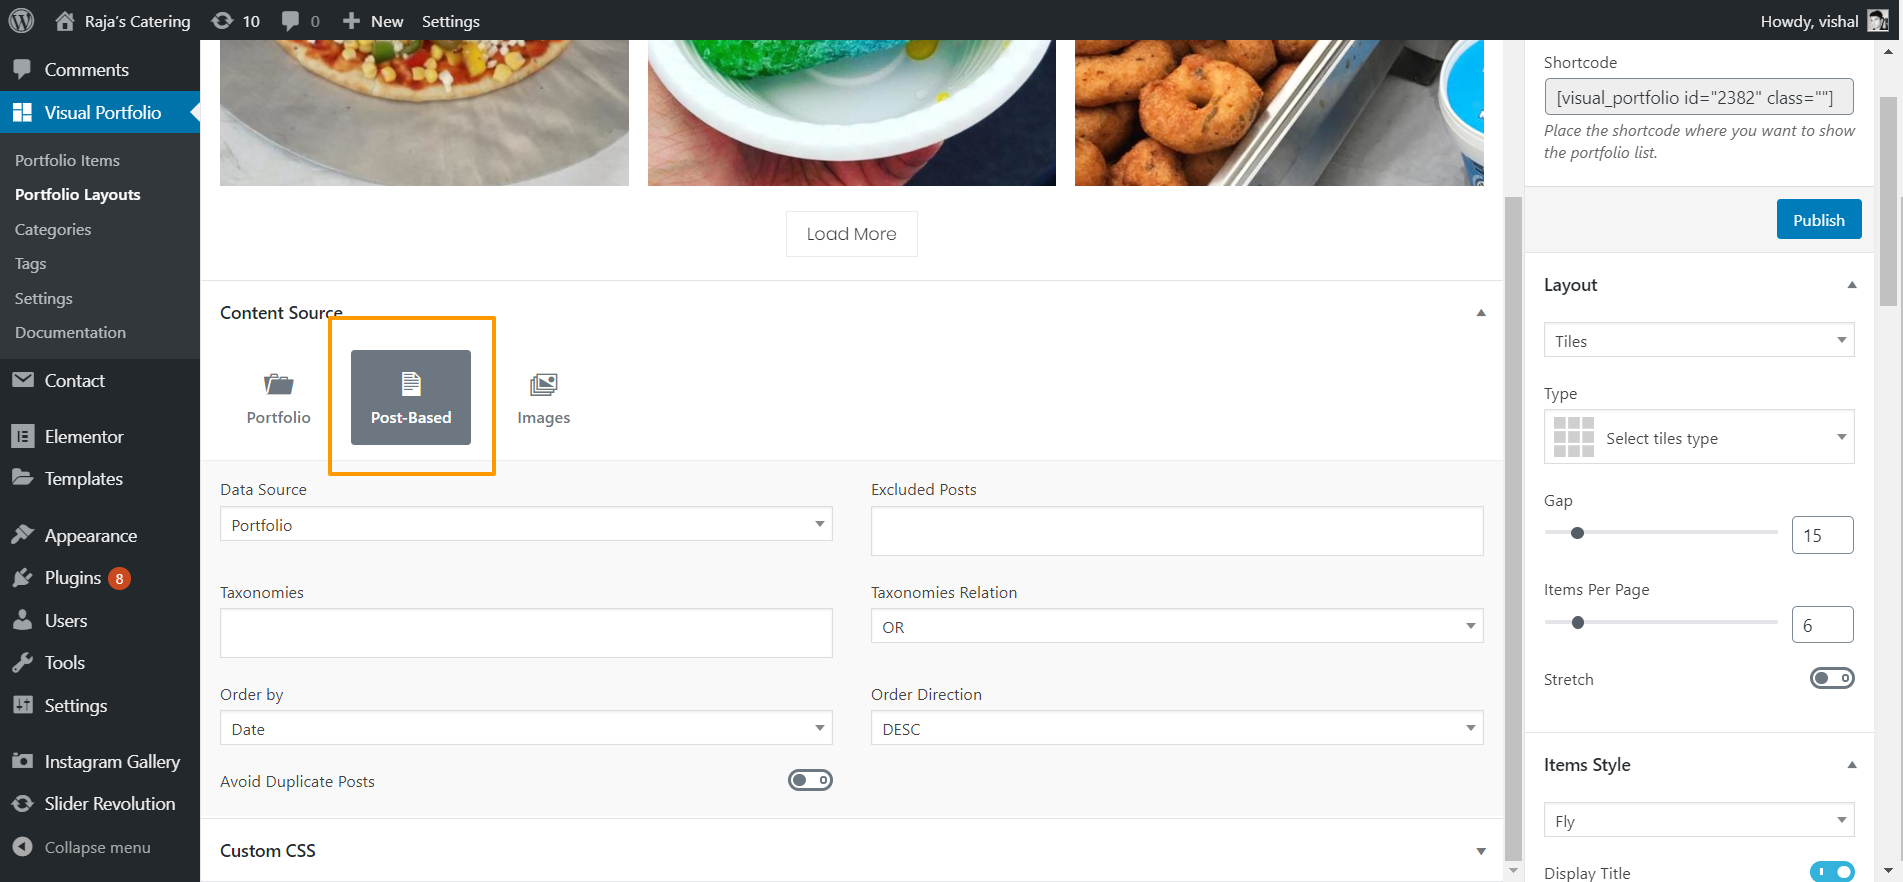
- Select the Post-Based option, if you want to use your posts as the source.

- You also can the portfolio using image option.

- Portfolio Items
-
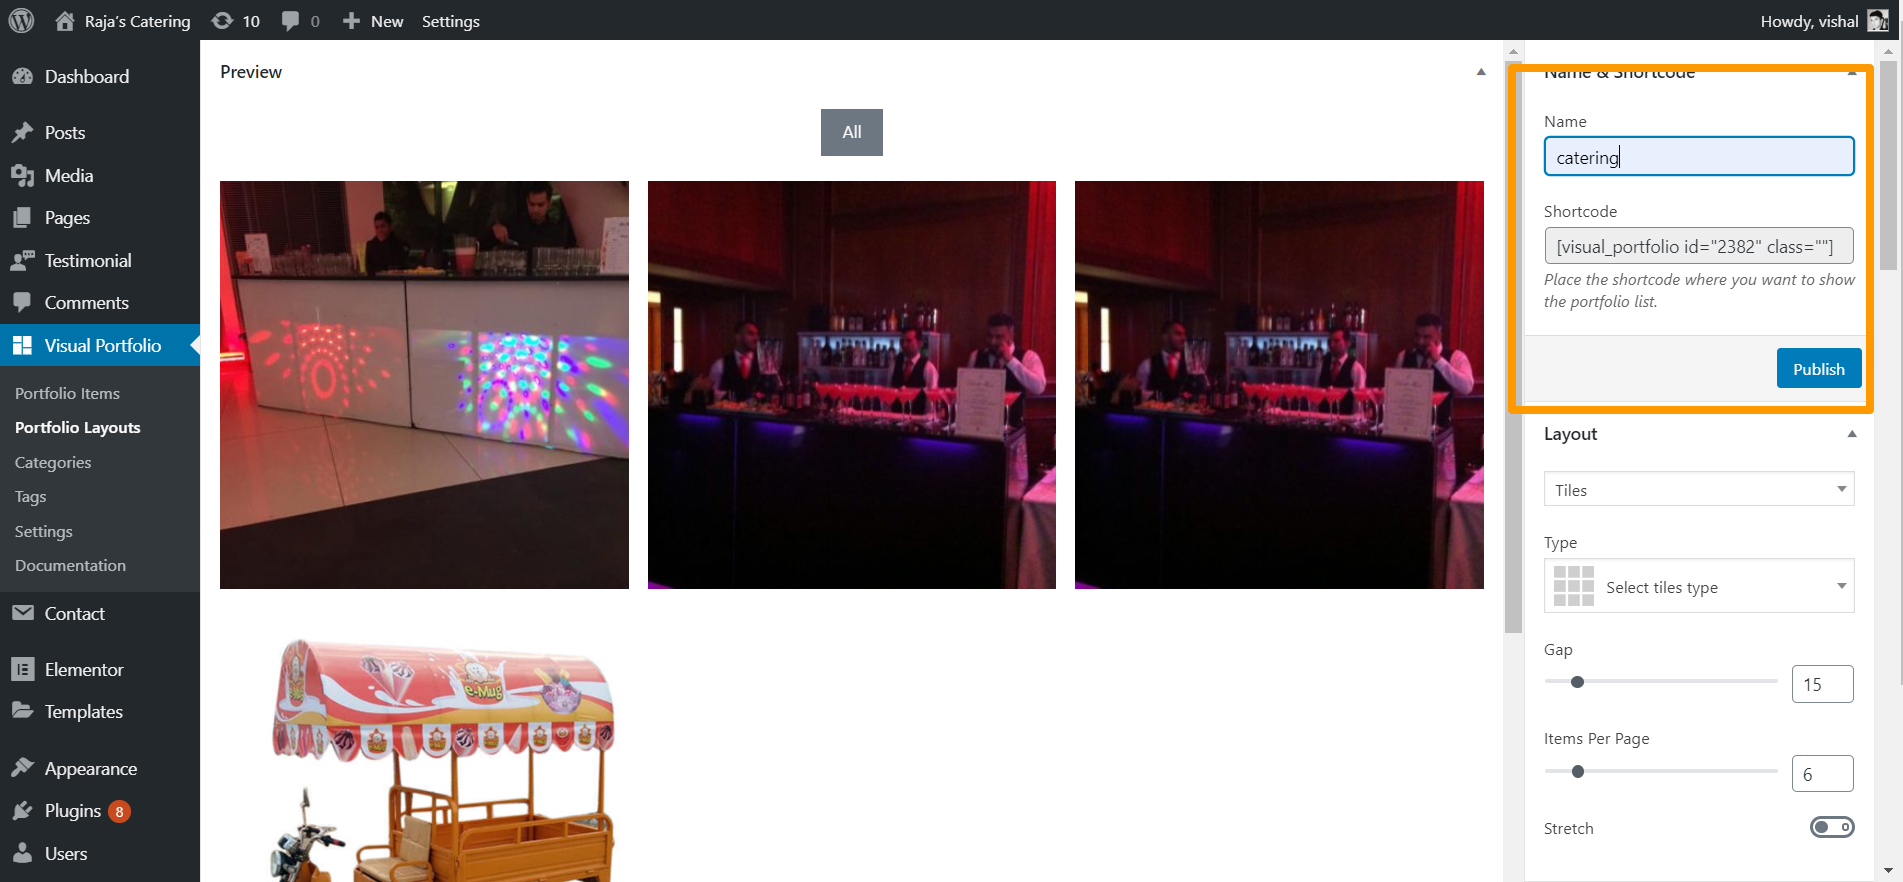
Name & Shortcode
- Name: set the name of your layout, it will be shown in your editor and in the list of created layouts.
- Shortcode: you can copy this shortcode to use it in your posts. The value of this field cannot be changed.

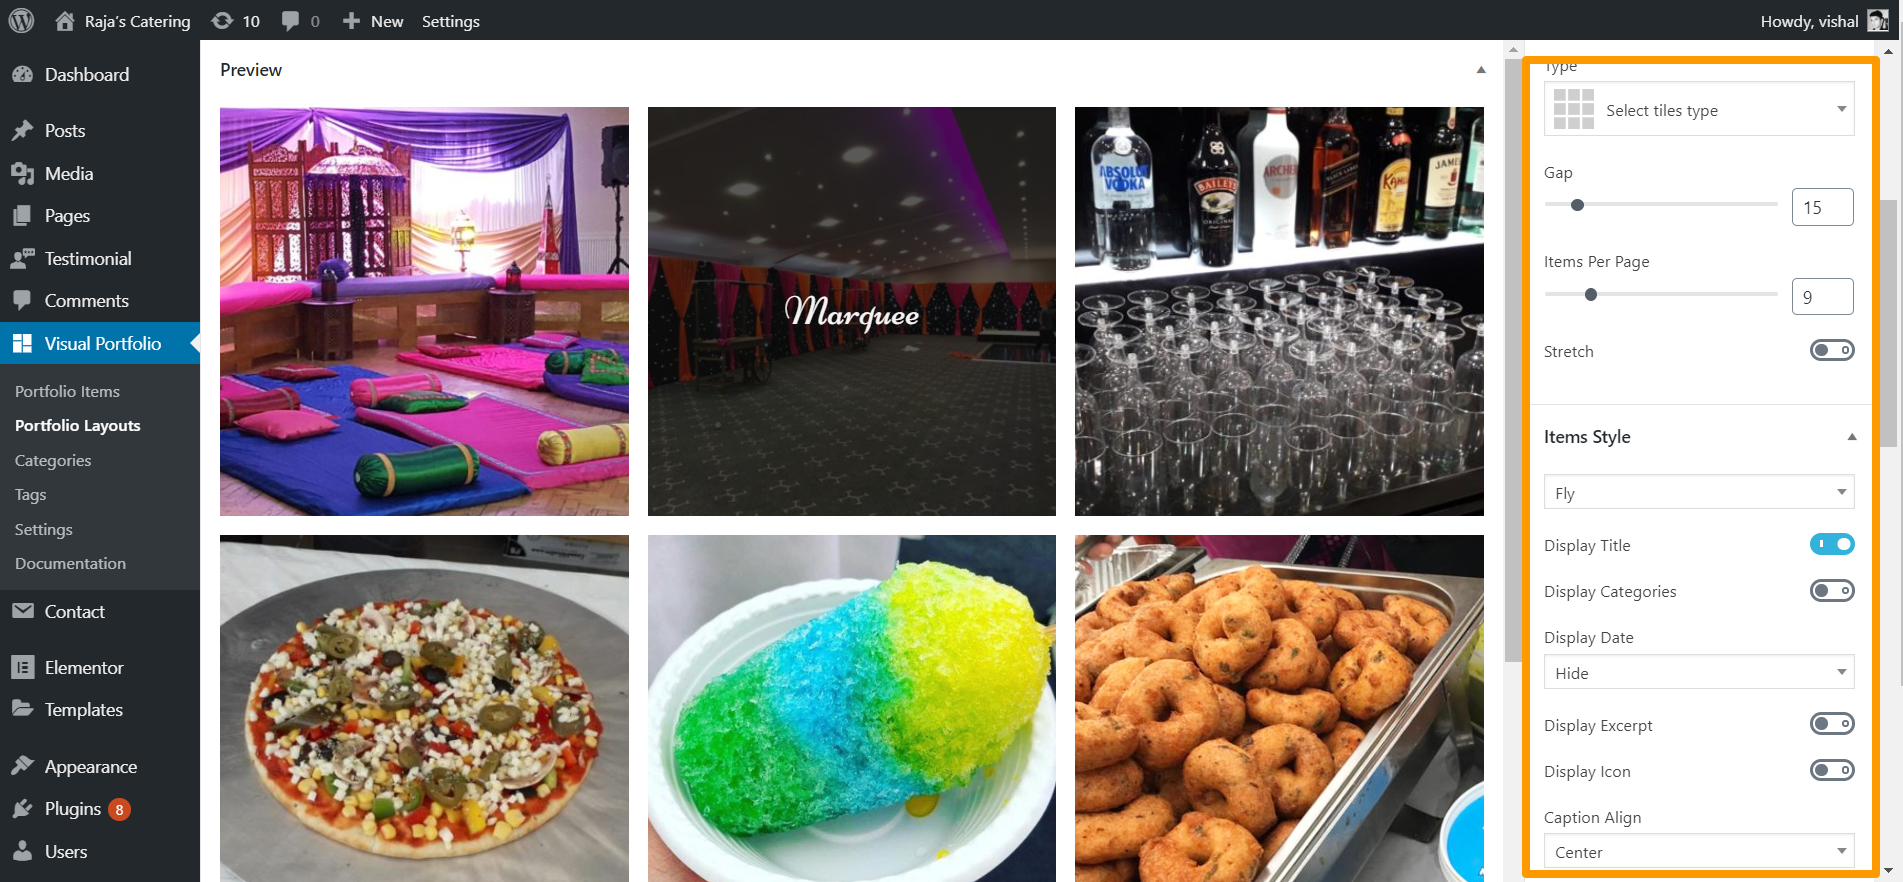
- Layout and design
you can customize the layout and look by using different options

-
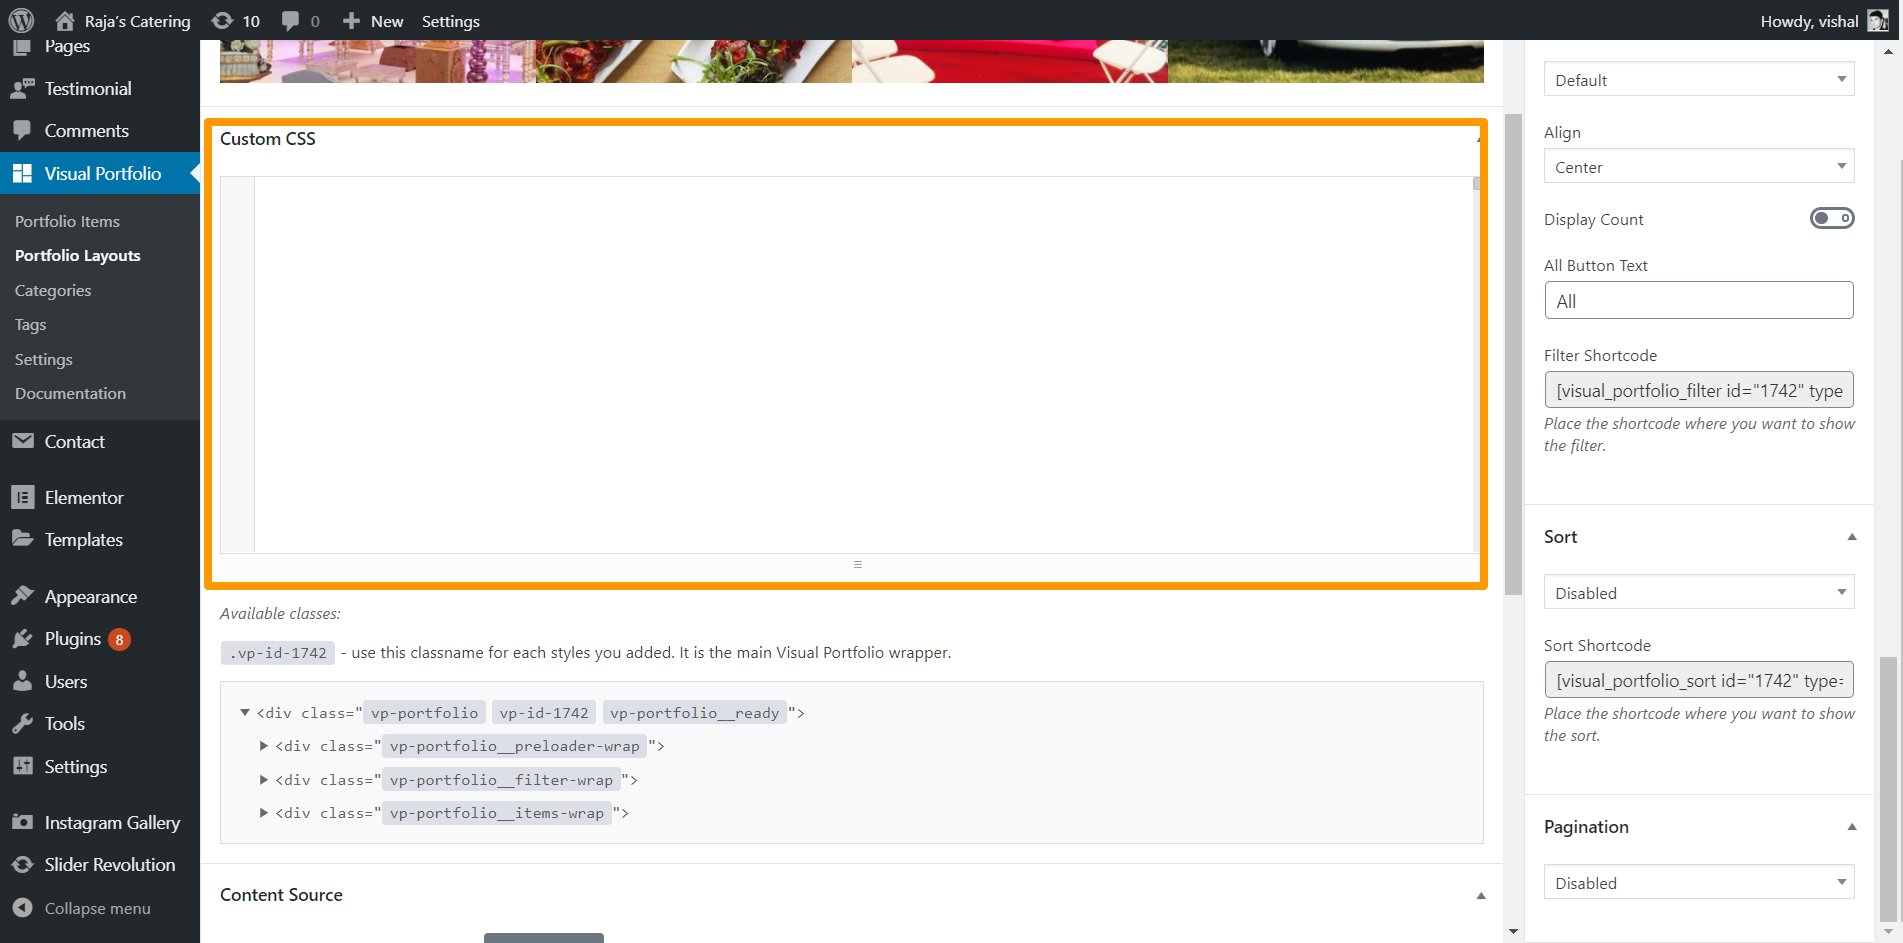
Custom CSS
Under the Content Source section you can add your costume CSS

-
Publishing portfolios
You can add the portfolio to your post or page by using shortcode or by selecting visual portfolio block.


